
Turn on RSVPs: deadline and meals
1 min readUpdated Sep 23, 2026
Turn on RSVPs, set a deadline and add your meals, or let your menu ask. Guests find their name and answer for their whole party.
- Open RSVP and turn on “Enable RSVPs”. Set a deadline: guests can’t answer once it passes.
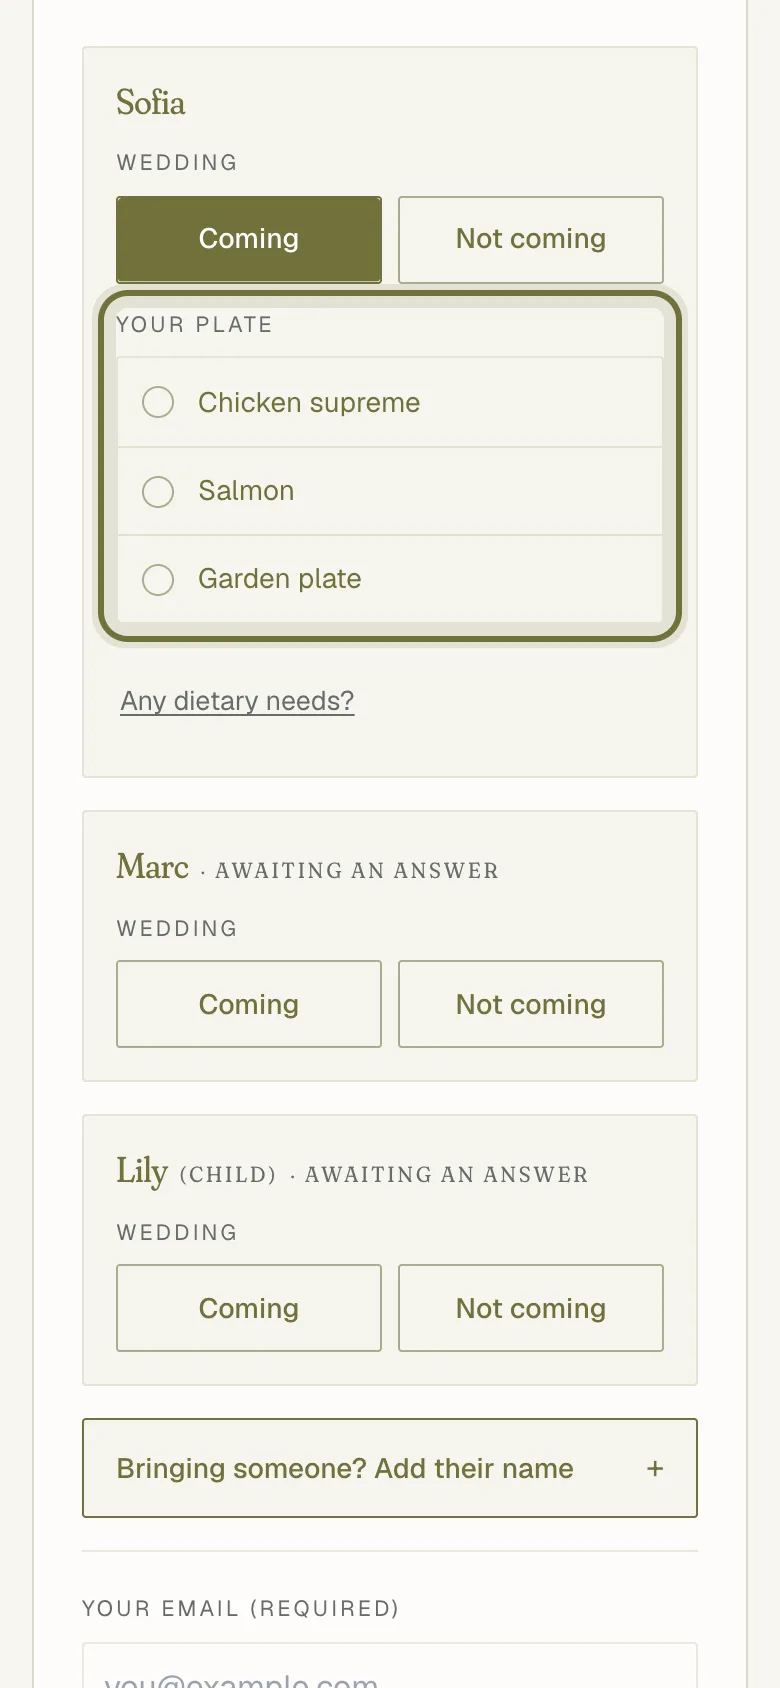
- The main event is there from the start. Add meal options for what you’re serving, or let your menu ask: on the Menu screen, the course marked “Ask in the RSVP” becomes the meal question, and its dishes show here.
- Add a welcome dinner or an after-party as another event, and restrict one to guests with a tag, like “Family”.
Guests search their name the way they already do. Whoever answers can speak for the whole party at once, add a named plus-one if you’ve allowed it, and answer the one extra question you set, a song, a note. A confirmation email goes out the moment they send it.
Every answer lands on the guest record, and Attending decides who counts toward seating. Re-importing your spreadsheet keeps a guest’s answer when the row says attending or declined. A blank row never overwrites one.
RSVPs are unlimited on every plan. Premium raises the 50-guest seating cap, not the RSVP count.
What guests will see
If it isn’t working
Related
Did this help?
A person answers.
We reply within one business day, Monday to Friday. If your event is in the next 3 days, write “Urgent” in the subject line and we’ll look at it first.